Setting up a study desk the right way can dramatically boost your focus, efficiency, and overall learning experience. This guide walks you through every step—from choosing the perfect spot to organizing supplies—so you can create a space that supports deep work and long-term success.
Key Takeaways
- Choose a quiet, well-lit location: Natural light and minimal distractions are essential for maintaining focus during study sessions.
- Prioritize ergonomics: A comfortable chair, proper desk height, and correct screen positioning prevent fatigue and improve posture.
- Keep only essential items on your desk: A clutter-free surface reduces mental load and helps you stay on task.
- Use smart storage solutions: Drawers, trays, and organizers keep supplies within reach but out of sight.
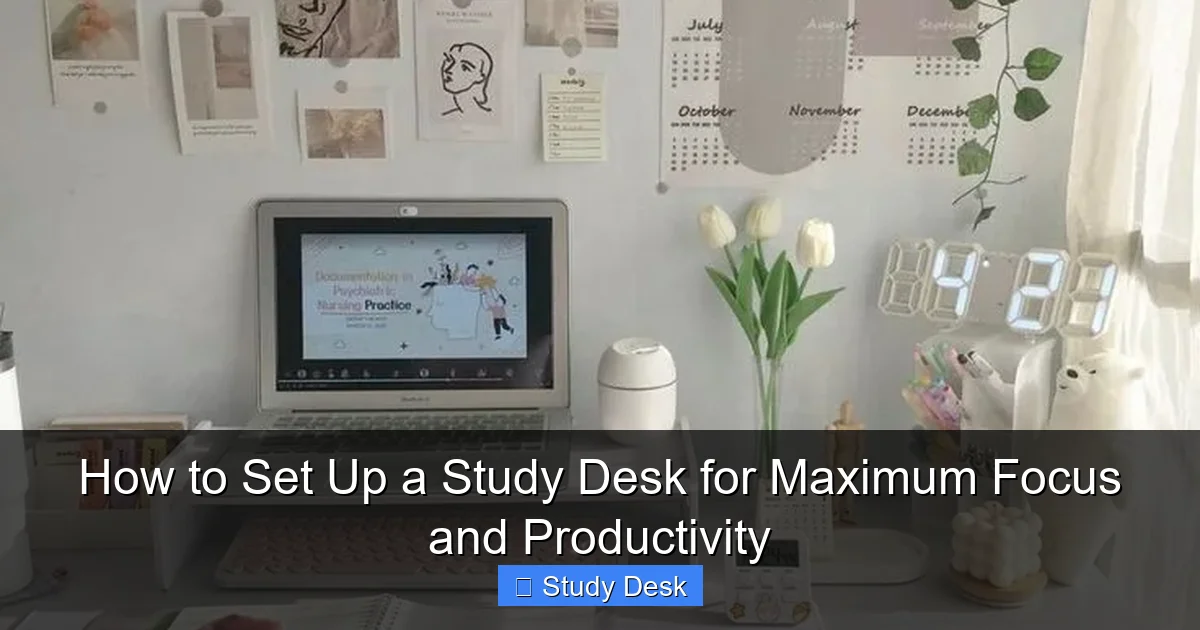
- Personalize with purpose: Add motivational items like plants or quotes—but avoid anything that causes distraction.
- Optimize lighting and tech setup: Good lighting reduces eye strain, while cable management keeps your workspace tidy.
- Maintain your space regularly: A quick daily reset ensures your study desk stays functional and inviting.
How to Set Up a Study Desk for Maximum Focus and Productivity
Creating the ideal study desk isn’t just about placing a laptop on a table—it’s about designing a space that supports your brain, body, and goals. Whether you’re a student preparing for exams, a remote worker tackling deadlines, or a lifelong learner diving into new skills, your study environment plays a huge role in how well you concentrate and retain information.
In this guide, we’ll walk you through every step of setting up a study desk that maximizes focus and productivity. You’ll learn how to choose the right location, pick the best furniture, organize your tools, and maintain a space that keeps you motivated day after day. By the end, you’ll have a personalized, high-functioning study zone that helps you work smarter—not harder.
Let’s get started!
Step 1: Choose the Right Location
The first step in setting up a study desk is picking the perfect spot in your home. Where you place your desk can make or break your ability to focus.
Look for Natural Light
Natural light is one of the most underrated productivity boosters. Studies show that exposure to daylight improves mood, alertness, and cognitive performance. Whenever possible, position your desk near a window. Morning light is especially beneficial—it helps regulate your circadian rhythm and keeps you energized.
If you can’t get direct sunlight, choose a spot with consistent, indirect light. Avoid placing your desk where harsh glare hits your screen, as this can cause eye strain.
Minimize Distractions
Your study area should be as quiet and distraction-free as possible. Avoid high-traffic zones like hallways, kitchens, or living rooms where family members or roommates frequently pass by.
If you live with others, consider using a room divider, bookshelf, or even a curtain to create a visual boundary. Noise-canceling headphones can also help block out background sounds like TV, conversations, or traffic.
Ensure Privacy and Comfort
You’re more likely to stay focused if you feel comfortable and undisturbed. A bedroom corner, spare room, or even a quiet nook under the stairs can work well. Just make sure the space feels personal and inviting—somewhere you actually want to spend time.
Pro tip: If you’re studying in a shared space, try to establish “quiet hours” with others in the household so you can study without interruptions.
Step 2: Select the Right Desk and Chair
Your furniture choices directly impact your comfort and productivity. A poorly designed setup can lead to back pain, neck strain, and fatigue—none of which help you focus.
Choose a Desk That Fits Your Space
Your desk should be large enough to hold your essentials—laptop, notebook, lamp, and maybe a cup of coffee—but not so big that it overwhelms the room. Standard desk sizes range from 36 to 60 inches in width.
If space is limited, consider a wall-mounted desk, a fold-down table, or a compact writing desk. L-shaped desks are great for multitaskers who need extra surface area for books, monitors, or planners.
Look for a desk with a smooth, durable surface that’s easy to clean. Wood, bamboo, or high-quality laminate are excellent choices. Avoid glass tops if you’re prone to smudges or reflections.
Invest in an Ergonomic Chair
Your chair is just as important as your desk. Sitting for long periods can cause discomfort and reduce focus, so choose a chair that supports good posture.
Look for these features:
– Adjustable seat height (your feet should rest flat on the floor)
– Lumbar support (to maintain the natural curve of your spine)
– Adjustable armrests (to keep shoulders relaxed)
– Breathable fabric (to stay cool during long sessions)
If your budget is tight, consider adding a lumbar cushion or seat pad to an existing chair. Even small adjustments can make a big difference.
Set the Correct Desk Height
Your desk should allow your elbows to rest at a 90-degree angle when typing. If your desk is too high, you’ll hunch your shoulders. If it’s too low, you’ll slump forward.
Most standard desks are 28–30 inches tall, which works for people between 5’4″ and 6’0″. If you’re taller or shorter, look for an adjustable desk or use risers or footrests to customize the height.
Step 3: Organize Your Study Supplies
A cluttered desk is a distracted mind. Keeping your study supplies organized helps you stay focused and saves time.
Keep Only Essentials on the Desk
Resist the urge to fill your desk with every pen, notebook, and gadget you own. Instead, keep only the items you use daily:
– Laptop or notebook
– Writing utensils
– Sticky notes or planner
– Water bottle
– Desk lamp
Everything else should be stored out of sight but within reach.
Use Drawer Organizers and Trays
Drawer dividers, small trays, and compartment boxes help you sort supplies like paper clips, USB drives, highlighters, and sticky notes. Label each section so you know exactly where things go.
If your desk doesn’t have drawers, use a desktop organizer with multiple compartments. Bamboo or acrylic trays look clean and modern.
Store Books and Papers Neatly
Use a bookshelf, stackable bins, or a rolling cart to store textbooks, notebooks, and reference materials. Keep frequently used books on a nearby shelf or in a desktop stand.
For loose papers, use a vertical file organizer or a tray labeled “To Read,” “In Progress,” and “Completed.” This prevents stacks of paper from taking over your desk.
Cable Management Is Key
Loose cords from chargers, headphones, and lamps can create visual clutter and become tripping hazards. Use cable clips, Velcro straps, or a cable management box to keep wires tidy.
Route cords along the back or underside of your desk. If possible, use a power strip with USB ports to reduce the number of adapters.
Step 4: Optimize Lighting and Tech Setup
Good lighting and a well-organized tech setup are essential for long study sessions.
Use Layered Lighting
Relying on just one light source can cause eye strain. Instead, use layered lighting:
– **Ambient lighting:** Overhead lights or ceiling fixtures provide general illumination.
– **Task lighting:** A desk lamp focuses light on your work area.
– **Accent lighting:** Small LED strips or a Himalayan salt lamp can add warmth and reduce glare.
Choose a desk lamp with adjustable brightness and color temperature. Warm light (2700K–3000K) is relaxing for evening study, while cool white light (4000K–5000K) boosts alertness during the day.
Position Your Screen Correctly
If you’re using a laptop or monitor, place it at eye level to avoid neck strain. The top of the screen should be at or slightly below eye level, and about an arm’s length away.
Use a laptop stand or stack of books to raise your screen. Pair it with an external keyboard and mouse for better ergonomics.
Reduce Digital Distractions
Your tech setup should support focus, not sabotage it. Turn off non-essential notifications on your phone and computer. Use apps like Freedom, Cold Turkey, or Focus@Will to block distracting websites during study time.
Consider using a second monitor if you frequently switch between documents or research sources. Just make sure it’s positioned to avoid neck twisting.
Step 5: Personalize Your Space (Without Overdoing It)
A personalized study desk can boost motivation and make you look forward to studying. But too many decorations can become distractions.
Add Motivational Elements
Include a few meaningful items that inspire you:
– A vision board with goals and quotes
– A small plant (like a succulent or snake plant) to improve air quality
– A photo of a loved one or a place you love
– A motivational poster or sticky note with a mantra (“One step at a time,” “Progress, not perfection”)
Keep these items minimal and placed where they won’t interfere with your work.
Use Calming Colors
Color psychology plays a role in focus and mood. Soft blues and greens promote calm and concentration, while warm whites and light grays create a clean, neutral backdrop.
Paint your walls or use a desk mat in these tones. Avoid bright reds or neon colors, which can be overstimulating.
Incorporate Sensory Comfort
Small sensory touches can enhance focus:
– A soft rug under your feet
– A cozy throw blanket draped over your chair
– A diffuser with lavender or peppermint oil (known to improve concentration)
Just make sure these items don’t clutter your space or become distractions.
Step 6: Maintain Your Study Desk
Even the best setup loses its effectiveness if it’s not maintained. A daily reset keeps your study desk functional and inviting.
Do a 5-Minute Reset Each Day
At the end of each study session, spend five minutes tidying up:
– Put pens back in the organizer
– File loose papers
– Wipe down the desk surface
– Charge your devices
This small habit prevents clutter from building up and makes it easier to start fresh the next day.
Deep Clean Weekly
Once a week, do a deeper clean:
– Dust your desk, lamp, and shelves
– Wipe down your keyboard and screen
– Empty and clean your trash bin
– Reorganize drawers if needed
A clean space feels more professional and helps you stay focused.
Reassess Monthly
Every month, ask yourself:
– Is my desk still working for me?
– Do I need more storage?
– Are there items I no longer use?
Adjust your setup as needed. Your study habits and tools may change over time, and your desk should evolve with them.
Troubleshooting Common Study Desk Problems
Even with the best setup, you might run into issues. Here’s how to fix common problems:
Problem: My desk feels too small.
Solution: Use vertical space. Install floating shelves above your desk for books and supplies. Switch to a wall-mounted desk or use a lap desk for lighter tasks.
Visual guide about How to Set Up a Study Desk for Maximum Focus and Productivity
Image source: i.pinimg.com

Visual guide about How to Set Up a Study Desk for Maximum Focus and Productivity
Image source: thumbs.dreamstime.com

Visual guide about How to Set Up a Study Desk for Maximum Focus and Productivity
Image source: i.pinimg.com
Problem: I keep getting distracted by my phone.
Solution: Keep your phone in another room or use a phone lockbox. Enable “Do Not Disturb” mode and place the phone face down if it must stay nearby.
Problem: My back hurts after studying.
Solution: Check your chair and desk height. Add a lumbar cushion or footrest. Take a 5-minute stretch break every hour.
Problem: I can’t find my supplies when I need them.
Solution: Label your organizers and return items to the same spot every time. Use a checklist to track frequently used tools.
Problem: The lighting is too harsh or too dim.
Solution: Adjust your lamp’s brightness or switch to a bulb with a different color temperature. Add a dimmer switch if possible.
Conclusion
Setting up a study desk for maximum focus and productivity doesn’t require a fancy office or expensive gear. It’s about creating a space that supports your body, mind, and goals. By choosing the right location, investing in ergonomic furniture, organizing your supplies, optimizing lighting, and maintaining your setup, you can build a study environment that helps you stay focused, energized, and motivated.
Remember, the best study desk is one that you actually use. Start small, make adjustments as you go, and don’t be afraid to personalize your space in ways that inspire you. With a little effort, your study desk can become your most powerful tool for learning and success.
Now go create your perfect study zone—and get to work!