

Floating shelves look simple: a clean slab on the wall with no brackets in sight. That simplicity is exactly why so many of them sag, tilt, or pull out of the wall. The thing holding your shelf up is a hidden bracket, and how well that bracket is fixed to the wall matters far more than how the shelf looks. A pretty shelf on two drywall anchors is a shelf waiting to fall. The same shelf screwed into studs can hold a row of books for years.
This guide is a full walk-through, in plain language. It explains how floating shelves work, how much weight they really hold, how to choose a depth, thickness, and material, where to hang them, how to install them step by step, what to do on tricky walls, how to style them, and what goes wrong. It uses manufacturer data, home-improvement publishers, and safety common sense, and we say clearly when a figure is a seller’s claim and when it is our own rule of thumb.
Quick Answers
- Studs decide the strength. Anchor the bracket into at least two wall studs for anything heavier than light decor. Studs are typically 16 inches apart.
- Drywall anchors alone are for light things only. Shelfology puts drywall-only mounting at roughly 5 to 10 pounds, and says the shelf can lever the anchors out of the wall.
- Depth works like a lever. The deeper the shelf, the less weight it holds. A 10-inch depth is a common all-round choice.
- Do not trust a number on a box. Many ratings are for the best case, with studs and a full set of screws. Plan for less than the rating.
- Use a stud finder and a level, and test the shelf with half the load for a day before you fill it.
- Renting? Floating shelves need screws in the wall. If you cannot drill, use a ledge, a leaning shelf, or the no-hole ideas in our renter guides.
What Is a Floating Shelf and How Does It Work?
A floating shelf is a shelf with no visible supports. It looks like it hangs from the wall by magic. The trick is a hidden bracket: a metal plate screwed to the wall, with rods or arms that stick out from it. The shelf itself is a hollow box or a drilled slab that slides over those rods, so the bracket disappears inside it.
Shelfology, a maker of these brackets, puts it simply: the rods must be strong enough to hold the shelf and everything on it, yet small enough to vanish once the shelf is on. Its founder, quoted by Domino, says that visible brackets make a regular wall shelf, not a floating one, and warns not to rely on wall anchors alone because the weight of the shelf will lever them out of the wall (Domino).
That last point is the key to everything that follows. A heavy load far from the wall pulls the top of the bracket away from the wall like a crowbar. If the screws are in drywall, they have almost nothing to bite into, and they pull out. If the screws are in studs, they have wood to grip.
How Much Weight Can a Floating Shelf Hold?
This is the question most people ask and the one with the least honest answers. The real answer is: it depends on the bracket, the screws, the wall behind it, the depth of the shelf, and where you put the weight. The sources we found disagree on the numbers, so we show ranges and name who said what.
What the Sources Say
| Mounting | Rough capacity (seller or source figures) | Who says so |
|---|---|---|
| Drywall anchors only | About 5 to 10 pounds | Shelfology guide (a bracket seller) |
| Plastic anchors in drywall | Around 10 to 25 pounds in one source | Guides summarized in search results; figures vary |
| Toggle bolts in drywall | Around 25 to 50 pounds depending on bolt size, with snap toggles often listed higher | Guides summarized in search results; figures vary |
| Two studs, well-made bracket | Shelfology cites about 90 to 100 pounds for a whole shelf; some other guides cite about 45 to 50 per stud | Shelfology and others |
| Three studs, well-made bracket | Shelfology cites about 135 to 150 pounds | Shelfology |
| Typical big-box shelf with stamped hardware | About 20 pounds or less | Shelfology guide |
Bracket Rods and Length
The more rods that go into studs, the stronger the shelf. Shelfology’s own rod guidance for its brackets gives a rough idea of how many attachment points a longer shelf needs:
| Shelf length | Rods suggested (Shelfology) | Why |
|---|---|---|
| Up to 36 inches | 2 | Spans two studs at 16-inch spacing in many walls |
| 36 to 52 inches | 3 | Three studs, or two with a third support |
| 52 to 72 inches | 4 | A long span needs more fixing points to resist sagging |
| Over 72 inches | 5 | Very long shelves need many points and often blocking behind the wall |
The same logic applies to any brand. A long shelf with only two small rods at the ends will sag in the middle. A long shelf needs a long bracket plate that crosses several studs.
What Your Stuff Actually Weighs
People guess weight badly. A row of books weighs far more than it looks. These Shelfology examples, tied to the bracket size it recommends, give a feel for real loads (again, these are the seller’s estimates):
| Load | Rough weight |
|---|---|
| 12 dinner plates | About 20 pounds |
| A countertop microwave | 25 to 40 pounds |
| A 2-foot run of hardcover books | 40 to 70 pounds |
| A 4-foot run of hardcover books | 80 to 140 pounds |
| A full open-shelf kitchen load of dishes and glasses | 100 to 200 pounds |
| A mantel with decor, or a mounted TV | 200 pounds or more |
These figures show why a cheap shelf rated for 20 pounds is a decor shelf, not a bookshelf. A single two-foot run of heavy books can be three times that.
A Simple Way to Estimate Your Load
- List what will go on the shelf. Books, plants, frames, plates, a speaker.
- Weigh a sample. Weigh five books on a kitchen or bathroom scale and divide by five. Do the same with a plate or a pot.
- Multiply by how many fit. A 36-inch shelf holds about 30 to 40 average paperbacks.
- Add the shelf’s own weight. A solid wood shelf can weigh 10 to 20 pounds.
- Add a safety margin of at least 50 percent. That is our rule of thumb, not a standard.
| Example | Load estimate | With 50 percent margin | Mounting we would choose |
|---|---|---|---|
| 3 small plants and a frame on a 24-inch shelf | About 8 pounds | About 12 pounds | One stud plus a good anchor, or two studs for peace of mind |
| 30 paperbacks on a 36-inch shelf | About 20 to 25 pounds, plus the shelf | About 45 pounds | Two studs, a steel bracket |
| Full row of hardcover books on a 48-inch shelf | About 80 to 140 pounds, per Shelfology | About 120 to 210 pounds | Three or more studs, a heavy-duty bracket, or blocking |
| Dishes for a family on a kitchen shelf | About 100 to 200 pounds, per Shelfology | About 150 to 300 pounds | Studs or blocking, a heavy-duty bracket, and a shorter, shallower design |
The “mounting we would choose” column is our judgment. If a shelf will hold more than about 50 pounds, ask a pro to check the wall and the bracket, or add blocking behind the drywall.
Why Floating Shelves Fail
Most failures come down to three causes. Shelfology lists them as drywall-only mounting, undersized rods, and missed studs. We have seen the same ones in every story of a shelf that came off the wall.
| Cause | What happens | The fix |
|---|---|---|
| Anchors only, no studs | The shelf levers the top of the anchors out of the drywall, and the whole shelf tilts or falls | Find studs and screw into them |
| Undersized rods or a thin bracket | The rods bend and the front edge sags | Use a bracket rated above your load, and lighten the shelf |
| Missed studs | You thought you hit a stud, but screws only went into drywall | Confirm with a stud finder and a small test hole |
| Short screws | The screws bite only a little into the stud. One review found 3-inch screws that reached only 3/8 inch into the wood. | Check how far screws go past the drywall. Use longer screws if needed. |
| Too deep a shelf for the bracket | The lever effect overloads the bracket | Choose a shallower shelf, or a bracket rated for that depth |
| Heavy things at the front edge | Maximum leverage on the bracket | Put heavy items near the wall |
| Uneven wall | The bracket does not sit flat, and the shelf leans | Shim behind the bracket |
| Loose set screws | The shelf wobbles on the rods | Tighten the set screws or use silicone in the rod holes |
Choosing the Right Floating Shelf
Material
The material affects strength, weight, look, and how it handles damp. Sources disagree on MDF and particleboard. Shelfology says to avoid them for load-bearing shelves, while Domino’s guide highlights a water-resistant engineered-wood pair as a budget pick for bathrooms and basements. KTLA notes that wood is the strongest and most durable, MDF is lighter and cheaper than solid wood, and chipboard is the cheapest. Remember that some sources, like Shelfology and Ash Deco, sell solid-wood or steel shelves and so have a reason to criticize cheaper materials.
| Material | Strengths | Weaknesses | Best for |
|---|---|---|---|
| Solid hardwood (oak, walnut, maple) | Strong, looks rich, can be sanded and refinished | Heavy, costs more, can warp in damp | Books, kitchens, anywhere you want durability |
| Pine and other softwoods | Cheaper, easy to stain or paint | Dents more easily, knots can weaken | Light to medium loads and paint-grade projects |
| Plywood | Stable, strong for its weight, edges can be finished | Edge grain shows unless covered | DIY builds and modern looks |
| MDF and engineered wood | Cheap, smooth, takes paint well, often sold as a set | Sags under heavy loads, swells if the finish is damaged and water gets in | Light decor in dry rooms |
| Hollow-core box shelf | Light on the bracket, hides the rods, thick look | Needs a sturdy box and good fit | Thick, modern shelves with modest loads |
| Steel | Very strong for its thickness, thin profile, many colors | Costs more, can look industrial | Heavy loads and slim modern looks |
| Glass | Light look, great for small spaces | Fragile, shows dust and fingerprints | Bathrooms and display only |
Depth
Depth is the biggest choice after mounting. Each extra inch of depth multiplies the lever effect, so a deeper shelf holds less on the same bracket. Shelfology gives these depth ranges for use cases, and they match what home guides commonly suggest:
| Use | Depth | Why |
|---|---|---|
| Bathroom and display ledges | 5 to 8 inches | Enough for small bottles, candles, and frames |
| General use and books | About 10 inches | Fits most hardcover books and many decor items |
| Kitchen | 10 to 12 inches | Fits dinner plates and bowls |
| Media and office | 10 to 14 inches | Fits routers, speakers, files, and boxes |
| Floating desk | Up to 24 inches | Needs a special heavy bracket and studs |
As a rule of thumb, pick the shallowest depth that still fits what you plan to put on it. A shelf for picture frames does not need to be 12 inches deep, and a shallower shelf is safer and easier on the wall.
Thickness
Thickness matters for solid wood, because thin slabs flex. Shelfology gives minimum solid wood thicknesses by bracket class, from about 1 1/4 inches for light-duty up to 2 to 3 inches for extra-deep shelves, and says hollow or engineered builds can be from 3/4 inch to 3 inches. As a quick guide for solid wood:
| Shelf use | Minimum thickness (Shelfology figures) |
|---|---|
| Light decor | About 1 1/4 inches |
| Medium loads | About 1 1/2 inches |
| Heavy loads | About 1 3/4 inches |
| Extra deep shelves | 2 to 3 inches |
| Floating mantels | 2 1/4 inches and up |
A thick shelf also looks more substantial, which suits chunky modern and farmhouse styles. A thin shelf looks lighter and suits small rooms.
Length
Length should follow the wall, the furniture, and the studs. A shelf about two-thirds the width of the furniture below it looks balanced. A shelf the same width as a sofa looks formal, and a shelf narrower than half looks lost. Remember that studs are about 16 inches apart in many homes, so a shelf of 32 inches or longer can usually reach three studs if lined up well.
| Wall space | Shelf length that looks good | Notes |
|---|---|---|
| Above a 72-inch sofa | 48 to 60 inches | Leaves visual breathing room at each end |
| Above a 30-inch nightstand | 24 to 30 inches | Wider than the table looks heavy |
| Beside a window | As wide as the wall allows, with a gap from the frame | Keep 3 to 6 inches from the trim |
| Over a desk | Same width as the desk or a little shorter | Keep eyes and screens clear |
| Bathroom, over the toilet | 18 to 24 inches | Often two shelves, stacked |
| Entry wall | 24 to 36 inches | Keep it above the hook height |
These length ideas are our design suggestions, not standards.
Finish and Style
- Natural wood: Warm and classic. Pairs with most rooms.
- White: Clean and light, and blends into white walls so the objects stand out.
- Black: Strong and modern, and works well with a neutral or gray wall.
- Rustic brown: Farmhouse and cottage styles.
- Painted to match the wall: Makes the shelf disappear and the items seem to float.
Where to Hang Floating Shelves: Height and Spacing
Hanging height changes how a shelf looks and how safe it is. The numbers below are Shelfology’s recommended starting points, which are close to common design advice, and we add our own notes.
| Location | Height guide | Notes |
|---|---|---|
| Stand-alone shelf on a wall | Eye level, about 4 to 5 feet from the floor | Eye level reads naturally and keeps things safe from heads |
| Above a kitchen counter | 18 to 24 inches above the counter | Leaves room for appliances underneath |
| Above a couch | 10 to 12 inches above the back cushion | Keep it high enough to avoid bumping your head when you stand |
| Above a bed with no headboard | About 16 inches above the mattress | Avoid heavy or breakable items above a pillow |
| Above a toilet | At least 24 inches above the tank | Leaves room to reach the flush |
| Above a desk | At least 15 to 18 inches above the work surface | Our suggestion, so a monitor or lamp fits |
| In an entryway | Above coat hooks or at eye level | Keep it out of the way of coats |
Spacing Between Stacked Shelves
| What goes on the shelf | Gap to the shelf above |
|---|---|
| General | 10 to 18 inches |
| Small decor | 8 to 12 inches |
| Books and dishes | 12 to 15 inches |
| Tall items such as vases or small appliances | 18 to 24 inches |
| The minimum | Height of your tallest item plus 2 to 3 inches |
A good habit is to put a spare item on the floor, use painter’s tape to mark each shelf on the wall, and live with the tape for a day before you drill.
Floating Shelf Ideas by Room
Kitchen
Open shelves in a kitchen are a big load, since dishes are heavy. They also collect grease and dust, which our open shelving reality check covers in detail. If you do it, keep the shelf short, shallow, and well mounted.
| Item | Rule |
|---|---|
| Depth | 10 to 12 inches for plates |
| Mounting | Studs or blocking, with a heavy-duty bracket |
| Height | 18 to 24 inches above the counter |
| What goes up | Everyday plates, bowls, glasses you use often, so they do not collect grease |
| What stays in cabinets | Heavy cookware and rarely used items |
| Near the stove | Keep a safe distance and avoid wood shelves right above heat or steam |
Living Room
Floating shelves in a living room usually hold books, plants, frames, and a few decor items. The look works best when you vary heights and leave some empty space. If you want more living room ideas, see our budget living room ideas.
- Hang one long shelf above the sofa, or a pair of shelves on each side of a TV.
- Use a thick, wide shelf for a statement piece, and thin ones for a quiet look.
- Keep fragile items off shelves above seating where a fall could hurt someone.
Bedroom
- Use a shelf beside the bed in place of a nightstand if floor space is tight.
- Keep the load light and the items low-risk if the shelf is above the pillow.
- Put a picture ledge above the bed for frames you can swap.
For more ideas for a plain bedroom wall, see our bedroom wall decor ideas.
Home Office
Shelves above a desk add storage without using floor space. Keep the shelf high enough that a monitor, lamp, or head does not hit it. See our home office decor ideas for layouts, and our study desk setup guide for lighting and height.
Bathroom
Bathrooms are damp, so choose a water-resistant finish. Domino’s guide singles out an engineered-wood pair as bathroom and basement appropriate, and some sellers offer stainless or sealed options. Place the shelf at least 24 inches above the toilet tank and use light loads, since moisture can weaken weak anchors and cheap wood over time.
Entryway and Mudroom
A shelf above a row of hooks gives a spot for keys, mail, and a tray. Keep it above head height for tall people and out of the way of the door swing.
Nursery and Kids’ Rooms
Picture ledges are a good choice for books because covers face out, and a lip keeps items from sliding off. Keep shelves above reach for toddlers and out of the way of cribs and beds. Do not put heavy or breakable items on a shelf that a child could pull on or climb, and always mount into studs.
Garage and Utility Room
Use steel or heavy-duty brackets here, since loads are usually much heavier than decor. Mount into studs or blocking, and keep paint, chemicals, and tools stored safely.
Our Picks to Compare
We have not tested these products ourselves, so we do not rank them or call any “the best.” We chose a mix that covers the main needs: ready-made sets, a bathroom option, a picture ledge, and the installation gear. Check the current listing for size, thickness, weight rating, and whether anchors or screws are included. The listing information below comes from the Amazon product names.
| Product | Type | Good for | Think about |
|---|---|---|---|
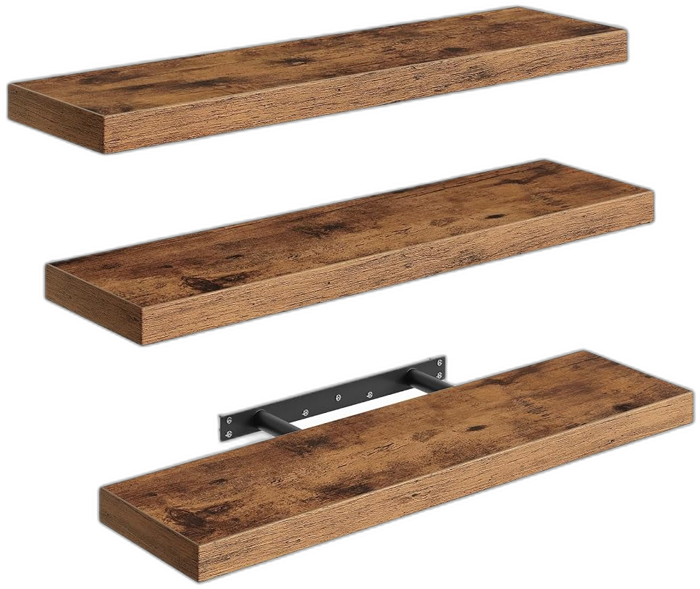
| RALGEND set of 3 with invisible brackets | Wood-look shelves, 1.5 inch thick, 23.6 inch | Living room or kitchen decor | Check the weight rating and what screws are included |
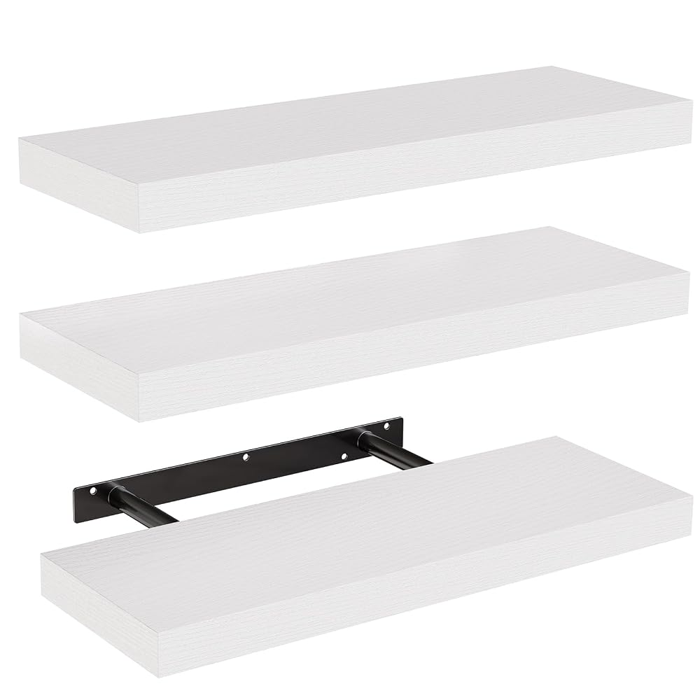
| Amada 15.7 inch set of 3, white | Small white shelves | Bedrooms, bathrooms, and small walls | Small size, so light loads |
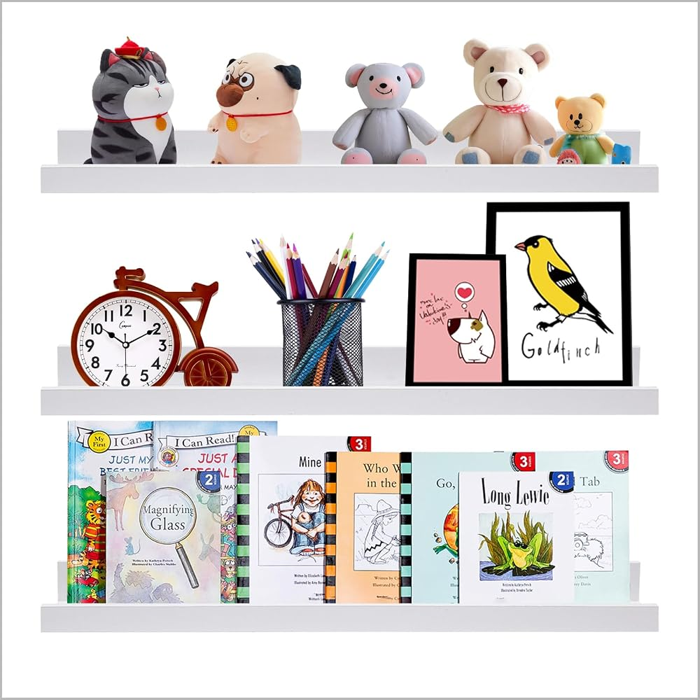
| AZSKY 24 inch picture ledge set | Shallow ledges with a lip | Frames, kids’ books, and display | Shallow, so for light items |
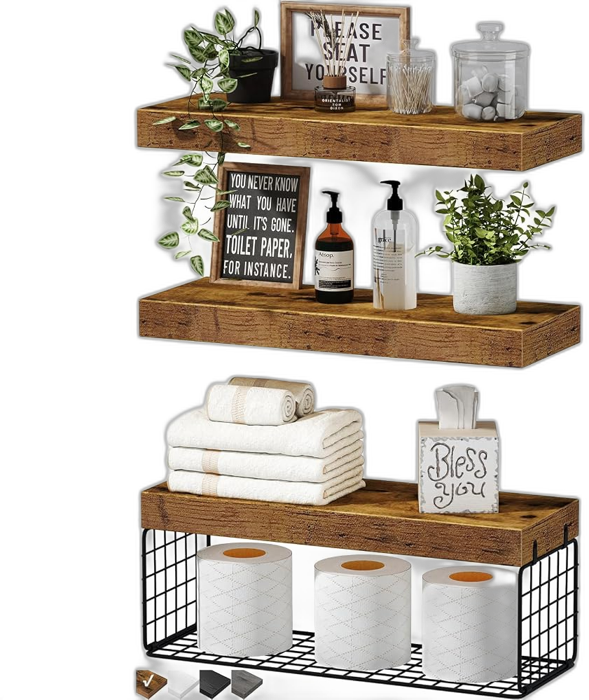
| QEEIG bathroom shelves, set of 3 | Wall shelves with a rail and basket | Over the toilet and bathroom storage | Check how it mounts and the weight rating |
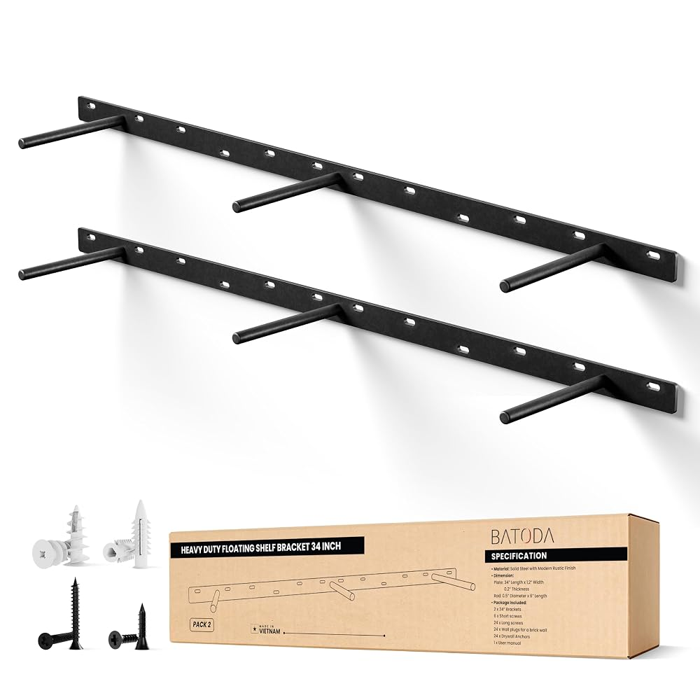
| BATODA 34 inch hidden bracket, 2 pack | Heavy-duty hidden brackets for your own wood | DIY shelves with real wood | You supply and drill the wood |
RALGEND Floating Shelf Set of 3
A set of three wood-look shelves with invisible brackets, listed as 1.5 inches thick and 23.6 inches long. This kind of set suits a living room wall or a kitchen where you want a rustic look. Read the listing for the weight rating and the mounting hardware, and plan to find studs, because the included anchors are only for light loads.
Amada 15.7 Inch Set of 3, White
A small white set for tight spots, such as beside a bed, a bathroom wall, or above a desk. White blends into white walls, so the objects on it take center stage. Keep the loads to small decor, plants, and frames.
AZSKY 24 Inch Picture Ledge Set
Picture ledges have a lip at the front that keeps frames and books from sliding off. They are shallow, so they put little leverage on the wall. They are good for kids’ book displays, frames you swap often, and entry walls.
QEEIG Bathroom Shelves, Set of 3
A bathroom set with a metal rail and a basket for towels. Choose it if you want storage above a toilet or beside a vanity. Check the listing for how it mounts and the weight rating, and keep the shelf above the 24-inch minimum from the tank.
BATODA 34 Inch Hidden Bracket, 2 Pack
If you want a thick real-wood shelf, you can buy hidden brackets and build the shelf yourself. This 2-pack lists 34-inch steel brackets. The brackets only work with a shelf body you prepare, such as a solid slab with drilled holes or a hollow box, so read our DIY section first.
Which Should You Choose?
How to Install a Floating Shelf, Step by Step
Tools You Need
| Tool | Why |
|---|---|
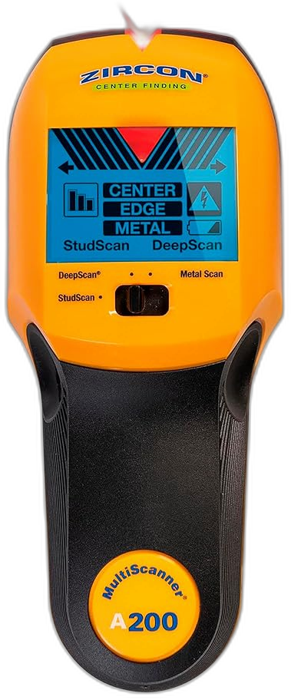
| Stud finder | Finds studs behind the drywall and can warn about wires |
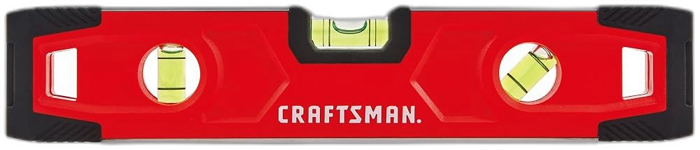
| Level | Keeps the bracket straight |
| Tape measure and pencil | For marking heights and spacing |
| Drill and bits | Pilot holes and screws |
| Screwdriver | For final tightening |
| Painter’s tape | To preview the position and mark studs |
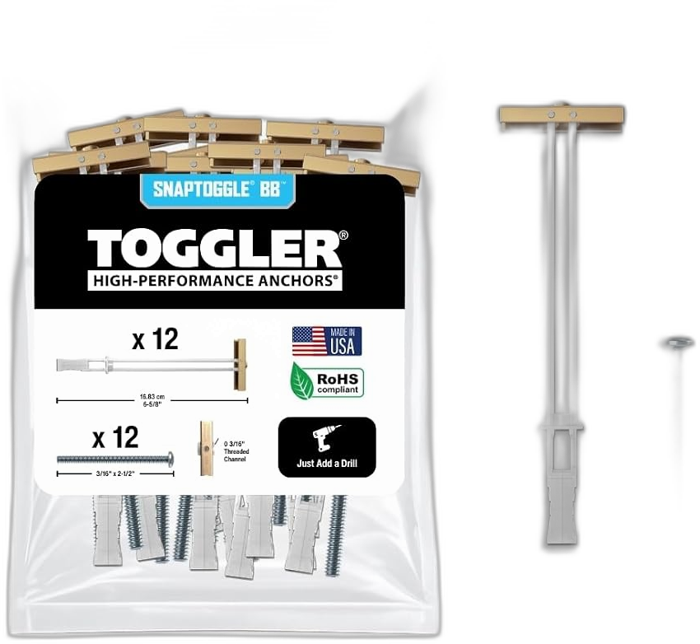
| Anchors (toggle or snap toggle) | For spots between studs |
| Shims | To fix an uneven wall |
| Safety glasses and a dust mask | Drilling creates dust |
Finding Studs Without Special Tools
- Use a stud finder. The easiest and most reliable.
- Look at outlets. Outlet and switch boxes are usually attached to a stud on one side.
- Measure from a known stud. Studs are often 16 inches apart, center to center.
- Tap. A hollow sound means drywall only. A duller, solid sound suggests a stud, though this is not very accurate.
- Use a thin nail or pin. Poke a small hole in a spot that will be hidden to confirm.
- Check baseboards. Nails in the baseboard often point to studs.
When There Is No Stud Where You Need One
- Move the shelf. Often a few inches either way puts the bracket across two studs.
- Use one stud plus a heavy anchor. Several guides say one stud and a toggle or snap anchor for the other side is a solid compromise for medium loads.
- Add blocking. If you can open the wall or are renovating, wood blocking between studs gives a strong, continuous mounting surface. Shelfology notes blocking gives the strongest mount.
- Use a mounting board. Screw a wood board across studs, then hang the shelf from the board, where the look allows.
- Keep it light. If you only have anchors, use the shelf for very light decor.
Snap toggles hold better than plain plastic anchors, and their listed holding power is much higher, but they are still a supplement to studs.
Different Wall Types
| Wall | What to know | What to use |
|---|---|---|
| Drywall over wood studs | The most common. Studs give strong mounting. | Screws into studs, anchors between |
| Drywall over metal studs | Metal studs are thinner and flex more. Sources note they hold less than wood. | Toggle bolts or special metal-stud anchors, with light loads |
| Plaster and lath | Brittle. Drilling can crack plaster. | Pilot holes, a low drill speed, and screws into studs behind the lath |
| Brick | Very strong with the right anchors | A masonry bit and masonry anchors, in the brick not the mortar if you can |
| Concrete or cinder block | Strong | A hammer drill, masonry bit, and sleeve or wedge anchors |
| Tile | Cracks if drilled wrongly | A tile bit, painter’s tape on the spot, and slow speed. Ideally drill into a stud behind. |
| Paneling and shiplap | The wall behind is usually studs or drywall | Find studs through the paneling and screw in |
If you are unsure what your wall is made of, check behind an outlet cover with the power off, or ask a handyman for a quick opinion before you drill.
Floating Shelves for Renters
A floating shelf needs screws in the wall, which most leases allow if you patch the holes when you leave. Check your lease. If you cannot drill, you have other options:
- Picture ledges and leaning shelves. A leaning ladder shelf needs no screws.
- Small light shelves on strong adhesive strips. These carry very little. Shelfology says adhesive and no-drill shelves have effectively no capacity for real loads, so use them for a few light frames only, and read our command hooks weight limits guide to see what adhesive can and cannot do.
- Tension-pole shelves or furniture. Freestanding shelving avoids the wall entirely.
For more no-hole ideas, see our renter-friendly decor ideas and 20 rental decorating ideas with zero holes. If you do drill, keep a photo of the stud positions, use as few holes as possible, and patch small holes with spackle when you move out.
Building Your Own Floating Shelf
A DIY shelf lets you pick the wood, the thickness, and the finish. There are two common builds, and both slide over the same hidden brackets:
| Build | How it works | Pros | Cons |
|---|---|---|---|
| Solid slab | Drill holes in the back edge to match the rods. A single piece of wood. | Strong and simple. Looks like thick wood. | Needs accurate drilling. Heavy. |
| Hollow box | Build a box with a top, bottom, and front, open at the back, from thin boards or plywood. | Light, looks thick, hides the bracket completely. | The box must fit the bracket snugly, and it holds less than a solid slab. |
A Simple Cut List for a 36 Inch Solid Slab
| Part | Size | Notes |
|---|---|---|
| Shelf slab | 36 x 10 inches, 1.5 inches thick | A hardwood board or glued panel |
| Hidden bracket | Rods about 8 to 9 inches long | Rods should be about 1 to 2 inches shorter than the depth |
| Holes in the slab | Match the rod diameter, drilled about 1/4 inch deeper than the rod length | Mark the positions from the bracket itself |
| Set screws or silicone | One per rod | Keeps the shelf from sliding off |
This sizing is our rule of thumb for a simple build. The key is accurate hole positions. Mount the bracket on a piece of scrap board first, mark the rods through it, and use a drill press or a drilling guide so the holes are straight. Sand and finish the shelf before you hang it.
Floating Shelves vs Other Wall Storage
A floating shelf is one choice among several. Before you buy, check that it is the right tool for what you want to store.
| Option | Strength | Look | Install effort | Best for |
|---|---|---|---|---|
| Floating shelf on a hidden bracket | Medium to high with studs | Clean and minimal | Medium. Needs accuracy. | Books, decor, kitchen items |
| Shelf on visible L brackets | Medium. Depends on the bracket and screws. | Classic, industrial, or rustic | Easy | Garages, pantries, and a rustic look |
| Picture ledge | Low, but it is shallow | Light and gallery-style | Easy | Frames, kids’ books, small decor |
| Cleat-mounted shelf | High. A wooden cleat spreads the load across studs. | Looks floating with a hidden cleat | Medium | DIY shelves and heavy loads |
| Freestanding bookcase | Very high, no wall load if anchored properly | Furniture look | None, though tall pieces should be anchored to the wall | Large collections and renters |
| Ladder or leaning shelf | Medium, rests on the floor | Casual | None | Renters and quick setups |
| Wall-mounted cube or box shelf | Medium | Modern | Medium | Display and small storage |
A cleat is a good middle option for DIYers. It is a strip of wood with an angled edge screwed into studs, with a matching strip fixed to the shelf so it hooks over the first. It spreads weight over a wider area than two rods can. It still needs to hit studs, and the shelf must be built to hide it.
Special Floating Shelf Projects
A Floating Nightstand
A floating nightstand frees the floor and makes a bedroom feel bigger. Use a shelf about 16 to 24 inches wide and 10 to 12 inches deep, hung with its top about even with the mattress top or a few inches above. Keep the load to a lamp, a book, and a glass of water. Mount into studs, since people lean on a nightstand without thinking. Our design rule is to keep the shelf away from where a sleeper’s head will be if it is heavy or fragile.
A Floating Desk
Shelfology’s guide mentions floating desks up to about 24 inches deep on a special bracket. A floating desk is a different level of load: arms rest on it, monitors sit on it, and people lean on it. It needs studs, a heavy-duty bracket made for the job, and ideally blocking. If you are not confident, use a desk with legs.
A Floating TV Shelf
A long, low shelf under a wall-mounted TV holds a streaming box and a soundbar. Most boxes weigh little, but a soundbar and console can add up. Check the weights, keep the shelf to a depth of 8 to 10 inches, and run cables behind the wall with a safe in-wall kit if you want to hide them. Do not hang a TV from a floating shelf, because TVs need a proper wall mount rated for them.
A Floating Mantel
A fireplace mantel is a heavier shelf, and Shelfology’s mantel brackets are rated much higher than its standard ones. If you are putting a shelf above a working fireplace, check local fire and building rules for clearances from the opening, and keep decorations that could catch fire well away from the heat.
Corner Shelves
Corner shelves use awkward space. Mount each wall side into studs or blocking, since a corner has two walls to catch. Use triangle or L-shaped shelves with brackets made for corners, and keep loads light.
A Floating Shelf Over a Window or Door
A shelf above a window or door looks neat, but check that you can reach it and that heavy things will not fall on someone passing through. Headers over openings are usually solid framing, and studs are on each side, so find the framing before drilling.
A Gallery Wall With Shelves
Mix picture ledges and a few floating shelves with framed art. Keep frames of the same color or style, and let objects overlap the frames. Start with the biggest piece, then fill in around it. Use painter’s tape to lay it out first.
Five Worked Projects
These examples show how to apply the rules. They are our own illustrations and use the numbers given earlier, not measured tests.
Project 1: Books Above the Sofa
| Step | Decision |
|---|---|
| Goal | A row of about 40 paperbacks and a few small plants above a 72-inch sofa |
| Shelf size | 60 inches long, 8 to 10 inches deep, 1.5 to 2 inches thick |
| Load estimate | About 30 to 40 pounds of books, 10 to 15 pounds of plants and decor, plus the shelf at 15 pounds or more, so about 60 to 70 pounds |
| Margin | Plan for about 100 pounds |
| Mounting | A bracket that crosses at least three studs, with four rods if you use a ready-made system |
| Height | 10 to 12 inches above the back cushion at least, and higher if people stand near it |
| Check | Load half the books, wait a day, then add the rest |
Project 2: A Kitchen Coffee Station
| Step | Decision |
|---|---|
| Goal | Mugs, a jar of coffee, and a small canister set on one shelf |
| Shelf size | 36 inches long, 10 inches deep |
| Load estimate | About 10 mugs at roughly 1 pound each, plus jars, about 20 to 25 pounds in total |
| Mounting | Two to three studs, a steel bracket |
| Height | 18 to 24 inches above the counter, clear of any appliance |
| Care | Wipe grease and steam. Do not put the shelf directly above a kettle or stove. |
Project 3: A Kid’s Book Ledge
| Step | Decision |
|---|---|
| Goal | Forward-facing picture books in a child’s room |
| Shelf type | A picture ledge 24 inches long with a front lip |
| Load estimate | About 10 to 15 picture books, a few pounds each in total |
| Mounting | Studs where possible, anchors if not, kept above reach of climbing |
| Height | Within a young child’s reach for books, but out of reach of anything fragile |
| Safety | Keep away from cribs and beds. Round the corners with sandpaper if needed. |
Project 4: Shelves Above a Desk
| Step | Decision |
|---|---|
| Goal | A shelf for a lamp, a small plant, and a few reference books above a 48-inch desk |
| Shelf size | 36 to 48 inches long, 8 to 10 inches deep |
| Load estimate | About 15 to 30 pounds |
| Mounting | Two studs, a steel bracket |
| Height | At least 15 to 18 inches above the desk so your head and monitor clear it |
| Extras | Run lamp cords neatly, and keep heavy books low |
Project 5: A Bathroom Shelf
| Step | Decision |
|---|---|
| Goal | Towels, a plant, and a few jars above the toilet |
| Shelf size | 20 to 24 inches long, 6 to 8 inches deep |
| Load estimate | About 8 to 15 pounds |
| Mounting | One to two studs plus a snap toggle between them |
| Height | At least 24 inches above the tank |
| Care | Choose a moisture-resistant finish and check the edges for peeling |
Lighting and Accessories for Shelves
- Under-shelf LED strips. Battery or plug-in strips give a glow that makes a shelf feel like a feature. Use low-heat LEDs and keep cords tidy.
- Shelf liners. A thin non-slip liner keeps ceramics from sliding and protects the finish.
- Bookends. Use heavy ones to keep stacks upright, and remember they add weight.
- Baskets and boxes. They hide clutter. Choose light ones for high shelves.
- Plant pots with saucers. Always use a saucer so water does not reach the wood.
- Small hooks under a shelf. Handy for mugs or keys, but remember the weight counts.
- Fasteners. Keep a small box of spare screws, anchors, and an Allen key so you can adjust or remove the shelf later.
What a Floating Shelf Really Costs
We do not list prices, since they change daily. The total cost of a floating shelf setup is made up of several parts:
| Cost | What drives it |
|---|---|
| The shelf or kit | Material, thickness, and brand. Solid wood and steel systems cost more than MDF sets. |
| Brackets | Heavy-duty brackets cost more than the light hardware in cheap sets. |
| Tools | A stud finder, a level, and a drill. Most people already have a drill. |
| Anchors and screws | Better anchors and longer screws cost a little more, but they are cheap insurance. |
| Finishing | Paint, stain, or sealer if you build your own. |
| Labor | A handyman for a heavy or long shelf, or for tile, plaster, or brick walls. |
| Repairs | Patching holes if you move or change the layout. |
A cheap set can be fine for decor. If it will hold books or dishes, spend on the bracket and the studs first.
Short Glossary
| Term | Meaning |
|---|---|
| Stud | A vertical wood or metal framing piece inside the wall, usually about 16 inches apart in many homes. |
| Blocking | Horizontal wood pieces fixed between studs to give a solid place to screw into. |
| Hidden or blind bracket | A bracket that disappears inside the shelf. |
| Rod | The arm that sticks out from the bracket plate into the shelf. |
| Set screw | A small screw from underneath that locks the shelf to a rod. |
| Toggle anchor | A wall anchor with wings that open behind the drywall to spread the load. |
| Snap toggle | A toggle anchor with a strap and channel that snaps into place behind the wall. |
| Cleat | A strip of wood with an angled edge used to hang a shelf or cabinet. |
| Shim | A thin wedge used to fill a gap behind a bracket on an uneven wall. |
| Lever effect | The way a load far from the wall pulls out on the top of the bracket. |
How to Style Floating Shelves
Good styling is the difference between a shelf that looks designed and one that looks cluttered. These simple rules work on nearly any shelf:
Arrangement Patterns
| Pattern | How | Looks |
|---|---|---|
| Stacked | Shelves directly above each other with equal gaps | Neat and formal |
| Staggered | Shelves of the same length offset left and right | Casual and modern |
| Ladder | Shelves of different lengths stepping up a wall | Playful and dynamic |
| Grid | Two columns of equal shelves | Organized, good for collections |
| Single long shelf | One long shelf above a sofa or bed | Calm and minimal |
| Corner wrap | Shelves that meet at a corner | Uses awkward space |
Styling by Room
- Kitchen: Plates, bowls, a cutting board, and a small plant. Keep it practical.
- Living room: Books, a plant, frames, and one sculptural object.
- Bedroom: A lamp, a small plant, and a few photos.
- Bathroom: Rolled towels, a candle, a small plant, and a jar for cotton swabs.
- Office: Books, a small plant, a box for papers, and a lamp.
- Entry: A tray for keys, a small bowl, a plant, and a mirror above.
How to Read a Floating Shelf Listing
Product pages are written to sell. These are the things to check before you buy, and the red flags to watch for.
| Check | What to look for | Red flag |
|---|---|---|
| Weight rating | A number tied to a condition, such as “when mounted into studs” | A big number with no conditions, or one that only applies to the shelf with no bracket |
| Thickness and depth | Listed in inches, with the real size, not just a style name | No thickness listed, or a very thin shelf with a high rating |
| Bracket | Steel, with a thick plate and solid rods, and photos of the hardware | Thin stamped metal or plastic parts |
| Screws and anchors | Which type is included and for which wall | Only small plastic anchors, with no mention of studs |
| Material | Real wood, plywood, or a named engineered board | Vague words like “wood-like” for a load-bearing shelf |
| Instructions | A clear guide, and a template for marking holes | Reviews that say the holes did not line up |
| Reviews | Photos of shelves with real loads after months | Many reviews that mention sagging or falling |
| Returns | An easy return window, since a bad bracket is only clear after installation | No return option |
Do not treat star ratings as proof of strength, since many reviewers hang decor only and leave a review the same day. Look instead at reviews that mention weight, and for photos that show the shelf loaded after some time.
A Weekend Plan for Hanging a Shelf Wall
A Maintenance Schedule
| When | What to do |
|---|---|
| The day after hanging | Check that the shelf is still level and has not moved. |
| After one week | Add the full load if the half load held. |
| After one month | Tighten the set screws and look for any gap at the wall. |
| Every three months | Dust the shelf, wipe the surface, and check for sag with a level. |
| Every year | Check the finish edges, especially in bathrooms and kitchens, and inspect the wall around the bracket for cracks. |
| When you add weight | Re-estimate the load and compare it with the rating and your margin. |
Questions to Ask Before You Drill
- What will the shelf hold in a year, not just on day one?
- Will a child, pet, or guest ever lean on, pull on, or climb it?
- Is anything heavy or breakable above a bed, a crib, a sofa, or a desk?
- Do I know where the studs, wires, and pipes are?
- Am I allowed to drill, and can I patch the holes later?
- Could a freestanding piece do the job better and more safely?
If you answer these honestly, you will rarely end up with a shelf on the floor.
Safety Notes
- Do not drill into wires or pipes. Use a scanner that detects live wires, and avoid the area above and below outlets and switches.
- Use safety glasses and a mask. Drilling makes dust that can irritate eyes and lungs.
- Keep breakable and heavy items away from beds, cribs, and seating. A shelf that falls on a person can cause real injury.
- Anchor into studs where children or pets are around. Kids climb and pull.
- Do not exceed the rating, and keep a safety margin.
- Recheck after a few weeks. Tighten set screws and check for sag.
- In earthquake areas, use lips or rails, and keep heavy items low.
- Heavy loads need a pro. If the shelf would hold more than about 50 pounds, ask a pro to check the wall and the bracket.
Care and Cleaning
- Dust with a dry or slightly damp cloth.
- Wipe spills right away, since water can swell MDF and mark wood.
- Do not use harsh cleaners on painted or stained finishes.
- Every few months, check for sag, loose set screws, and cracks in the finish.
- In bathrooms, check the finish edges for peeling, which lets water in.
Troubleshooting Table
| Problem | Likely cause | Fix |
|---|---|---|
| Shelf leans forward or tips | Wavy wall or the bracket is not fully seated | Shim behind the bracket and re-seat it |
| Front edge sags | Too heavy, or rods too small | Lighten the load, move items toward the wall, or upgrade the bracket |
| Shelf pulls away from the wall at the top | Drywall-only mounting | Remount into studs or blocking |
| Shelf wobbles on the rods | Loose set screws or oversized holes | Tighten the set screws, or add silicone in the rod holes |
| Shelf is not level | The bracket was not level, or the wall is uneven | Remount with a level, or shim |
| Screws spin and will not tighten | Stripped hole in drywall or a stud that was missed | Move to a stud, or use a toggle anchor |
| Cracks near the holes | Plaster or paint cracked by drilling | Patch and repaint, and use pilot holes next time |
| Shelf slab warped | Damp or thin wood | Replace with a thicker slab or a drier spot |
| Items slide off | Smooth surface and a slope | Check level, add shelf liner, or use a ledge with a lip |
Common Mistakes
Before You Buy: A Quick Checklist
- Do you know what will go on the shelf, and roughly what it weighs?
- Have you found the studs, and can the shelf cross at least two?
- Have you picked a depth that matches the use, and a thickness that matches the load?
- Does the bracket rating clearly exceed your load, with a margin?
- Do you know your wall type and have the right anchors?
- Do you have a stud finder, a level, a drill, and safety glasses?
- Have you marked the position with tape and checked the height?
- Do you know the lease rules if you rent?
Frequently Asked Questions
How much weight can a floating shelf hold?
It depends on the bracket, the screws, the wall, and the depth. Shelfology cites about 5 to 10 pounds for drywall anchors only and about 90 to 100 pounds for a well-made shelf screwed into two studs. Those are seller figures, so keep a safety margin.
Can I hang a floating shelf without studs?
Only for very light decor. Drywall anchors alone are rated for roughly 5 to 10 pounds by one bracket maker, and the shelf can lever them out of the wall. For anything heavier, use at least one stud, and preferably two.
How far apart are wall studs?
In many homes, about 16 inches center to center, though it can vary. Outlets and switches are usually mounted to a stud, which gives a clue.
How deep should a floating shelf be?
About 5 to 8 inches for bathrooms and display, about 10 inches for general use and books, 10 to 12 inches for kitchens, and 10 to 14 inches for media and office, per Shelfology. Choose the shallowest depth that fits your items.
How thick should a floating shelf be?
For solid wood, Shelfology gives minimums from about 1 1/4 inches for light loads to 2 to 3 inches for extra-deep shelves. Hollow or engineered builds can be 3/4 inch to 3 inches thick.
How high should I hang a floating shelf?
A stand-alone shelf is usually at eye level, about 4 to 5 feet from the floor. Above a couch is about 10 to 12 inches above the back cushion, above a counter 18 to 24 inches, and above a toilet at least 24 inches above the tank.
How far apart should stacked shelves be?
Generally 10 to 18 inches. For small decor, 8 to 12 inches. For books and dishes, 12 to 15 inches. The minimum is the tallest item plus 2 to 3 inches.
Are MDF floating shelves OK?
For light decor in dry rooms, yes. Shelfology advises against MDF and particleboard for load-bearing shelves, and MDF can swell if water gets in. Solid wood, plywood, and steel suit heavier loads.
What kind of anchor should I use if I miss a stud?
Toggle bolts and snap toggles hold better than plain plastic anchors, but they are a supplement to studs, not a replacement, for shelves that carry real weight.
How do I find a stud without a stud finder?
Look at outlets and switches, measure 16 inches from a known stud, check baseboard nails, or tap and listen. A stud finder is still the easiest and most reliable choice, and many also detect live wires.
Can I put a floating shelf on tile or brick?
Yes, with the right bits and anchors. Use a tile bit and painter’s tape on tile, ideally drilling into a stud behind it. For brick or concrete, use a masonry bit or hammer drill and masonry anchors.
Why is my floating shelf sagging?
Usually because the load is too heavy for the rods, the shelf is too deep, or heavy items sit at the front. Move heavy items to the back, lighten the load, or upgrade the bracket.
Can I use a floating shelf in a bathroom?
Yes. Choose a water-resistant finish, keep the shelf at least 24 inches above a toilet tank, and keep loads light. Check the finish edges for damage that can let moisture in.
Can renters use floating shelves?
If your lease allows screws, yes, and you can patch the holes when you leave. If not, use picture ledges, leaning shelves, or freestanding furniture. Adhesive shelves carry very little weight.
How do I stop a floating shelf from wobbling?
Tighten the set screws under the shelf, or add silicone in the rod holes. If it leans, shim behind the bracket so it sits flat against the wall.
Can I build my own floating shelf?
Yes. Buy hidden brackets and either drill a solid slab to fit the rods or build a hollow box that slides over them. Accurate hole positions are the key.
Sources and Further Reading
- Shelfology: The complete guide to floating shelves (a bracket maker, so figures are the seller’s own)
- Domino: What to look for in the best floating shelves, according to Shelfology’s founder
- Real Homes: The best floating shelves
- KTLA: Best floating shelves
- Ash Deco: How much weight floating shelves hold (a solid-wood shelf seller)
- Rambling Renovators: What you need to know before you install floating shelves
- Drew and Jonathan: How to hang floating shelves
Weight figures vary by maker and wall, and most are not independently tested. Treat them as rough guides, keep a safety margin, and ask a professional if a failure could hurt someone. Last checked October 2026.

Sophia Turner covers budget home decor, seasonal styling, and outdoor spaces at The Dailey House. She has a talent for finding thrift store pieces that look like they cost three times what she paid, and a habit of redesigning her front porch every single season.